

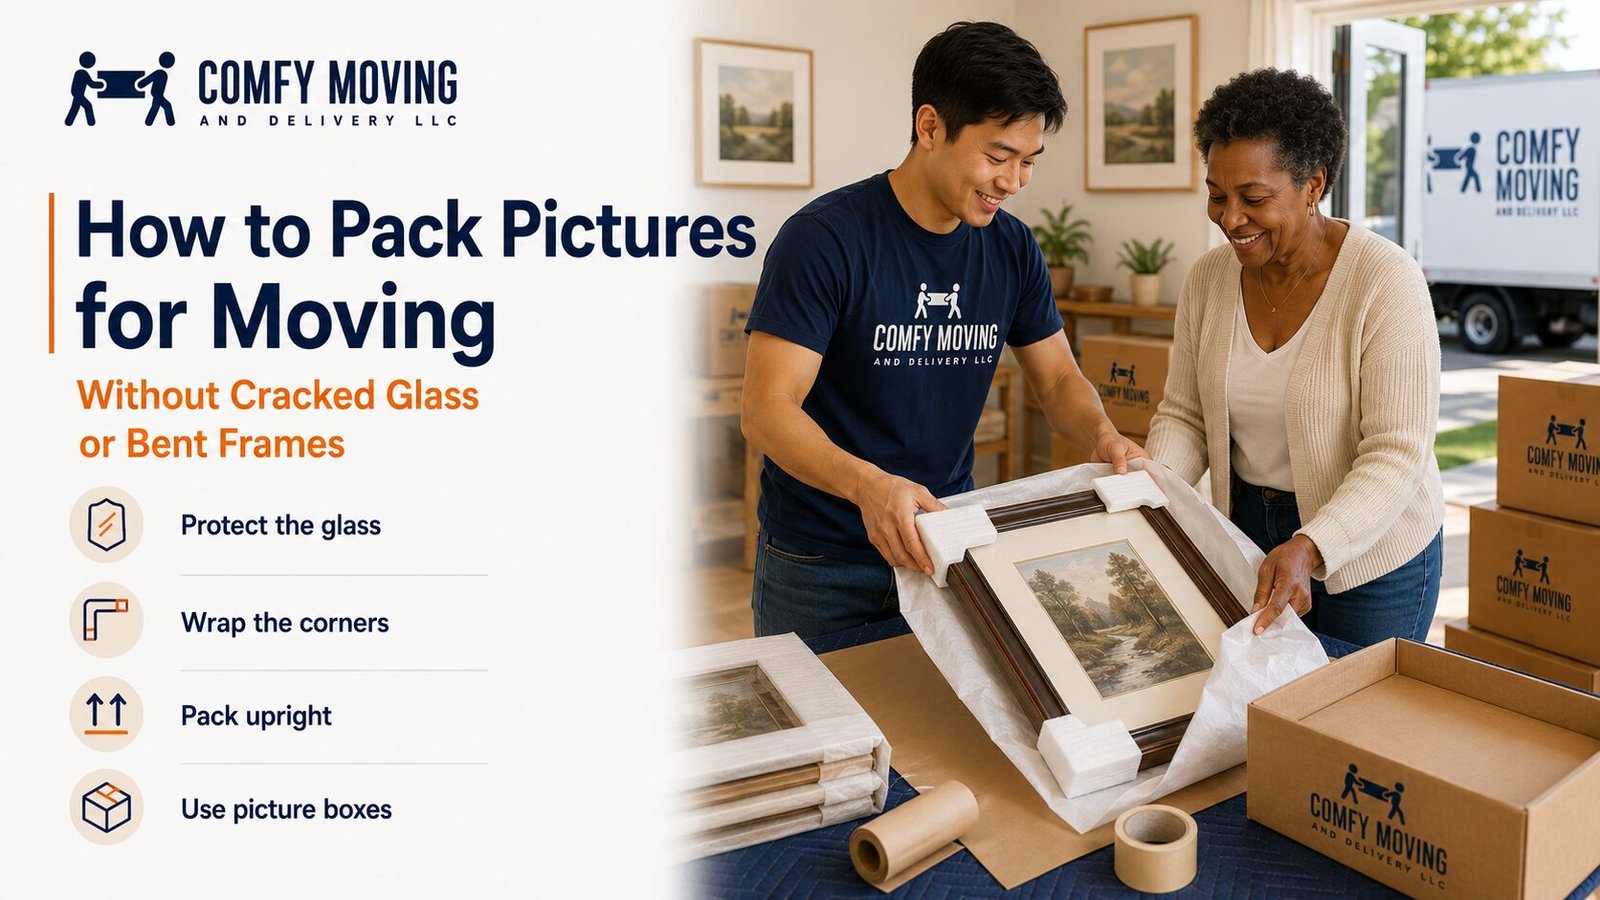
How to Pack Pictures for Moving Without Cracked Glass or Bent Frames
A framed picture can survive years on a wall and still be damaged during a five-minute walk to the moving truck.
The problem is rarely the weight. Pictures are difficult to carry because they are thin, wide, fragile, and easy to grip in the wrong place. Glass can crack after one sharp bump. Decorative corners can chip against a doorway. A loose hanging bracket can tear through wrapping, while an overloaded box may bend a frame before it reaches the new home.
Learning how to pack pictures for moving means protecting more than the front surface. The glass, frame, corners, artwork, backing, and hanging hardware all need attention.
The right packing method depends on what you are moving. A small family photograph does not need the same treatment as a large canvas, a framed print under glass, or an antique mirror. Start by sorting the collection, gather the correct materials, and pack each piece according to its construction.
Sort the Pictures Before Packing
Take a slow walk through the home before removing anything from the walls.
Make a quick list of:
- Small framed photographs
- Medium and large framed prints
- Pictures with glass
- Canvases without glass
- Mirrors
- Shadow boxes
- Posters
- Antique or valuable artwork
- Oversized pieces
- Frames with decorative or fragile details
Sorting first helps you estimate how many picture boxes, corner protectors, and rolls of packing material you will need.
It also prevents a common moving-day mistake: taking every picture off the wall at once and leaving a crowded stack leaning against the furniture. Frames can slide, glass surfaces can knock together, and small pieces may become trapped behind larger ones.
Work through one room at a time. Create a clean packing area and keep finished boxes away from the pieces that are still waiting to be wrapped.
Decide What Is Worth Moving
Pictures often remain on walls for so long that no one stops to ask whether they still belong in the home.
Before packing, separate anything that is:
- Damaged beyond practical repair
- No longer wanted
- Unlikely to suit the new space
- Easy and inexpensive to replace
- Better suited for donation or sale
- Still waiting to be framed
Do not throw away frames simply because the artwork inside is no longer needed. A good frame may be reused for another print or family photograph.
Valuable, sentimental, signed, or irreplaceable pieces should be identified early. These may need individual boxes, additional insurance documentation, professional packing, or personal transportation.
Photograph the Artwork and Frames
Take a clear picture of each valuable or delicate piece before wrapping it.
Capture:
- The front
- The back
- The corners
- Existing scratches or chips
- Labels, signatures, or edition numbers
- Hanging hardware
- Decorative details
These photos create a basic condition record and make it easier to remember where each item was displayed.
For a large collection, assign a number to every piece. Add the same number to the packing label and your inventory list.
A simple entry might read:
Picture 07 – Large blue print – Living room – Glass front
This makes unpacking easier and reduces the chance of a box being sent to the wrong room.
Gather the Right Packing Materials
Regular moving boxes are often too deep or too short for framed pictures. Picture and mirror boxes are built with a tall, narrow shape that gives frames better support.
For how to pack pictures for moving safely, gather:
- Picture or mirror boxes
- Small moving boxes for compact frames
- Packing paper
- Glassine or acid-free paper
- Bubble wrap
- Foam sheets
- Cardboard sheets
- Corner protectors
- Moving blankets
- Stretch wrap
- Strong packing tape
- Painter’s tape
- Permanent markers
- Labels or colored stickers
- Scissors
- A box cutter
- Work gloves
Use clean, dry materials. Old cartons with weakened seams or soft corners should not be trusted with framed glass.
Avoid placing newspaper directly against artwork or light-colored frames. Printing ink may transfer onto surfaces, especially when the items stay packed for several days or weeks.
Choose the Right Picture Box
Picture boxes are available in several sizes. Some are sold as adjustable sections that slide together around the frame.
Choose a box that leaves enough room for protective wrapping without allowing the picture to move freely.
A box that is too tight may press against the corners or glass. A box that is much too large requires excessive filler and leaves more room for shifting.
When one box is not wide enough, adjustable picture-box sections may be joined to create a larger container. Reinforce every connection with packing tape and make sure the completed box remains firm.
Oversized artwork may require:
- A custom cardboard sleeve
- Telescoping picture boxes
- A wooden crate
- Professional packing
- A padded section inside the moving truck
Do not try to force a wide frame into a standard carton by bending the box around it.
Prepare a Safe Packing Area
Choose a clean, level surface with enough room to lay the picture down without anything hanging over the edge.
A large table works well. The floor may also be used when it is clean and covered with a moving blanket or foam sheet.
Remove:
- Tools
- Loose screws
- Food and drinks
- Dust and grit
- Jewelry
- Keys
- Small toys
- Anything with a sharp edge
Keep pets and children away from the packing area. A picture placed face-up on the floor can be stepped on before anyone notices it.
Good lighting also matters. Small cracks, exposed staples, loose backing, or damaged corners are easier to spot before the wrapping begins.
Remove Pictures Carefully From the Wall
Use both hands when lifting a frame from its hook.
Do not pull it outward from one side. That can twist the frame or strain the hanging wire.
For a large picture, have another person support the opposite end. Lift evenly and move it directly to the prepared packing surface.
After removal:
- Take out loose wall hooks when appropriate.
- Place screws and hardware in a labeled bag.
- Check the frame for loose joints.
- Inspect the glass for cracks.
- Look for sharp hanging brackets.
- Make sure the backing is secure.
Do not pack a frame with already cracked glass as though it were undamaged. Broken glazing may shift inside the package and cut the artwork, backing, or person unpacking it.
Secure Loose Hanging Hardware
Sawtooth hangers, hooks, wire ends, nails, and brackets can puncture packing paper or scrape another frame.
Cover sharp or protruding hardware with folded cardboard, foam, or several layers of packing paper. Hold the covering in place with painter’s tape or stretch wrap.
Avoid applying strong packing tape directly to painted wood, finished metal, paper backing, or decorative surfaces. Adhesive can lift paint, leave residue, or tear the backing when removed.
If a removable bracket sticks out far enough to cause trouble, take it off and place it in a labeled hardware bag.
Check the Frame Before Wrapping
A loose frame corner may separate under pressure during the move.
Gently inspect each joint. Do not bend or twist the frame to test its strength.
For ordinary frames, minor loose areas may be stabilized temporarily with appropriate corner protectors. Valuable, antique, or heavily damaged frames should be evaluated before packing.
Also check that:
- The artwork sits properly inside the frame
- The backing board is secure
- Fasteners are not falling out
- The glass does not rattle
- Hanging wire is not loose
- Decorative pieces are firmly attached
Packing materials protect a stable frame. They cannot repair structural damage hidden underneath.
How to Protect Glass in Picture Frames
Glass is one of the most vulnerable parts of a framed picture.
Some movers place painter’s tape across the glass in a large X or grid pattern. This does not make the glass unbreakable. Its purpose is to help limit movement if the glazing cracks.
Use low-adhesion painter’s tape rather than strong packing tape, and keep it away from exposed artwork or delicate frame finishes.
For valuable pieces, consider placing a layer of glassine or smooth paper over the surface before adding foam or bubble wrap. The material touching the picture should be clean, soft, and unlikely to leave marks.
Never allow rough cardboard, newspaper, tape, or dirty bubble wrap to rub directly against delicate glazing or artwork.
How to Pack Pictures for Moving Step by Step
The following method works for many ordinary framed photographs, prints, and decorative pictures.
1. Protect the Front Surface
Lay the picture face-up on the padded packing surface.
Place a smooth foam sheet, glassine, or clean packing paper across the front. Cover the entire glass or artwork area.
For glass-fronted pictures, add a flat piece of corrugated cardboard over the protected surface. Cut it slightly smaller than the outer frame so it does not catch on decorative edges.
This cardboard layer creates a basic shield against light pressure and bumps.
2. Protect Every Corner
Place foam or cardboard corner protectors on all four corners.
Corners often absorb the first impact when a picture touches a wall, floor, truck interior, or neighboring box. They also carry much of the frame’s structural stress.
Make sure the protectors fit firmly without scraping the finish.
For ornate frames, standard corner pieces may not cover protruding details. Build custom protection with folded foam, cardboard, and packing paper.
3. Wrap the Entire Frame
Place the frame on a large sheet of packing paper.
Fold the paper over the picture as though wrapping a flat gift. Add another sheet when the first does not cover the entire frame.
Secure the paper to itself with tape. Do not attach tape directly to the frame.
Add bubble wrap around the paper-covered picture. Use enough to cushion the front, back, sides, and corners without creating excessive pressure.
Secure the bubble wrap with tape or stretch film.
4. Add a Rigid Outer Layer
For medium or large pictures, place cardboard sheets over the front and back of the wrapped frame.
The sheets should cover the full surface and remain flat. Hold them in place with stretch wrap.
A rigid outer layer helps prevent the frame from bending when it is carried or placed between other items.
5. Test the Package
Lift the wrapped picture from both sides.
The protective layers should remain in place. Nothing should slide, loosen, or expose a corner.
Do not pick up the package by one corner or by the hanging wire.
Packing Several Small Pictures Together
Several small frames may share one picture box, but every frame should be wrapped individually.
Do not place bare frames face-to-face. Glass, metal corners, and hanging hardware may scratch or crack neighboring pieces.
Pack the heaviest frame closest to the bottom or strongest side of the box. Place lighter frames beside it with cardboard dividers between them.
Keep all pictures standing vertically rather than stacked flat.
Fill open spaces with:
- Crumpled packing paper
- Foam sheets
- Bubble wrap
- Cardboard dividers
The frames should fit firmly enough to remain upright without being squeezed.
Before sealing the box, move it gently from side to side. If anything shifts, add more filler.
Packing Large Framed Pictures
Large frames should usually be packed individually.
After protecting the glass, corners, frame, front, and back, place the picture inside a fitted mirror box.
Add cushioning along the bottom before lowering the picture into the carton.
Fill the sides and top with foam or packing paper. Do not force material against the center of the glass.
The frame should not lean inside the box. It should remain straight and supported along the edges.
Seal the box with several strips of strong packing tape. Reinforce adjustable sections and lower seams.
For very large pieces, two people should carry the box. One person handling it alone may twist the frame or lose control in a doorway.
How to Pack Canvas Art Without Glass
An unframed or open canvas needs a different first layer.
Do not place bubble wrap directly against painted canvas. Plastic materials may stick to textured paint, trap moisture, or leave impressions.
Cover the front with glassine or acid-free paper. Place a smooth cardboard sheet over that protective layer without pressing into the painted surface.
Add corner protectors, wrap the piece in packing paper, and place bubble wrap around the outside.
For a gallery-wrapped canvas, protect the exposed sides and stretched corners carefully. A dent in the canvas may remain visible even when the paint is not torn.
Pack each canvas upright in a picture box or custom cardboard sleeve.
Packing Oil Paintings
Oil paintings may have raised texture, delicate varnish, or surfaces that react poorly to pressure and unsuitable materials.
Do not place plastic, bubble wrap, tape, newspaper, or ordinary cardboard directly against the painted surface.
Use appropriate archival material as the first layer and avoid pressing anything into the paint.
Valuable oil paintings may require:
- Professional art packing
- Custom crates
- Climate-aware transportation
- Specialized insurance
- Condition documentation
- Handling by trained art movers
A standard household packing method may not be enough for a valuable or historically important piece.
Packing Posters and Unframed Prints
Unframed posters and prints should not be folded unless they were designed to be stored that way.
Place each print between clean sheets of acid-free paper. Several flat prints may be packed inside a rigid art portfolio or flat document box.
Rolling may be suitable for some posters, but the printed side should face outward only when recommended for that material. Use a wide tube so the paper is not curled too tightly.
Do not secure a rolled print with a rubber band. It may leave a permanent mark.
Place the roll inside a strong poster tube with protected ends. Fill excess space so the print does not slide from one end to the other.
Packing Shadow Boxes
Shadow boxes are often deeper and heavier than ordinary frames. They may also contain objects that can break loose.
Before packing, check whether the contents move when the box is tilted slightly. If they do, the interior may need attention before transportation.
Do not open valuable or professionally assembled shadow boxes unless you know how the contents are secured.
Protect the glass, corners, and outer frame as you would with a standard picture. Add extra padding around decorative edges and pack the shadow box individually.
Clearly mark which side must remain upright.
Packing Antique or Ornate Frames
Antique and decorative frames can include plaster details, carved wood, gilding, beads, or raised corners that break under light pressure.
Do not wrap bubble wrap tightly around these surfaces. The pressure may crack or detach the ornamentation.
Use soft tissue, foam blocks, and custom cardboard supports to create space around projecting details.
Avoid tape, stretch wrap, or plastic touching painted, gilded, or unfinished surfaces.
For valuable pieces, professional packing is usually the safer option. A custom crate can support the frame without loading weight onto its most fragile areas.
Cushion the Picture Box
Prepare the carton before placing the wrapped picture inside.
Add a layer of foam, bubble wrap, or tightly crumpled packing paper along the bottom. The cushioning should create a level base.
Lower the picture into the box vertically.
Fill empty space along both sides and across the top. The filler should prevent movement without pressing hard against the glass or center of the frame.
Close the flaps naturally. If the top must be forced down, remove some filler or use a larger box.
Reinforce the top and bottom seams with packing tape.
Label Every Picture Box Clearly
Write labels on the top and at least two sides.
Useful labels include:
- FRAGILE
- PICTURES
- GLASS
- KEEP UPRIGHT
- DO NOT STACK
- SCREEN OR GLASS SIDE
- Destination room
A complete label might read:
FRAGILE – FRAMED PICTURES – KEEP UPRIGHT – LIVING ROOM
Add arrows to show the correct vertical direction.
Do not write descriptions such as “valuable original painting” on the outside. Use an inventory number instead.
Bright stickers can help picture boxes stand out from ordinary cartons during loading and unloading.
Do Not Overload Picture Boxes
A picture box may have enough physical space for several frames, but that does not mean every open inch should be filled.
Too much weight can:
- Weaken the bottom seam
- Bend the carton
- Put pressure on the frames
- Make the box difficult to control
- Increase the chance of dropping it
- Damage the lower picture
Use additional boxes rather than creating one oversized, heavy package.
Test the weight before sealing. The carton should be manageable for the people who will carry it.
How to Carry Packed Pictures
Carry picture boxes vertically with one hand supporting the lower edge and the other controlling the side.
Do not:
- Lift the box by the top flaps
- Carry it flat
- Drag it across the floor
- Hold it against sharp belt buckles or tools
- Rest it on one corner
- Use it to prop open a door
Large boxes should be handled by two people.
Clear the route before lifting. Picture boxes can block the carrier’s view, particularly on stairs or around tight corners.
Loading Pictures Into the Moving Truck
Picture boxes should remain upright inside the vehicle.
Laying them flat exposes the broad front surface to pressure. It also makes it more likely that another box will be placed on top.
Choose a location where the pictures are protected from shifting furniture and falling cartons.
Suitable placement may include:
- Between mattresses
- Beside a secured bookcase
- Against a padded truck wall
- Between broad, flat furniture pieces
- Inside a designated fragile-item section
Do not wedge pictures so tightly that the frames are under constant pressure.
Use straps or surrounding items to prevent movement. Keep metal bed rails, tools, lamps, and furniture corners away from the boxes.
Never stack heavy belongings on top of framed pictures.
Moving Pictures in a Car
Small or valuable pictures may be transported in a personal vehicle.
Keep them upright behind a seat or in another supported position. Use blankets or foam to stop the frames from sliding.
Do not place them loose in the trunk with tools, luggage, or boxes that can shift.
Avoid leaving artwork inside a hot or freezing vehicle for extended periods. Heat, cold, and moisture may affect paint, paper, adhesives, wooden frames, and backing materials.
Irreplaceable pieces should stay with you whenever practical.
Unpacking Pictures at the New Home
Take picture boxes directly to their destination rooms before opening them.
Place each box upright on a clean surface.
Cut tape carefully and keep the blade away from the frame. Remove the picture by supporting both sides rather than pulling on the top wrapping.
Unwrap one layer at a time and inspect:
- Glass
- Corners
- Frame joints
- Artwork surface
- Backing
- Hanging hardware
Do not lean several unpacked pictures against one another.
Keep them in a safe, low-traffic area until you are ready to hang them.
Wait Before Hanging Everything
There is no need to place every picture on the wall during the first hour after moving in.
Arrange the furniture first. Decide where shelves, lamps, sofas, and beds will stay. This reduces unnecessary holes and keeps frames away from furniture being assembled or moved.
When you are ready to hang pictures:
- Use hardware rated for the frame’s weight
- Check the wall material
- Avoid damaged hooks
- Replace stretched hanging wire
- Use suitable anchors
- Confirm that the frame sits securely
Heavy mirrors and large artwork may require two people or professional installation.
Common Picture Packing Mistakes
Wrapping Frames Together
Two unwrapped frames can scratch, chip, or crack one another. Wrap every piece separately.
Putting Bubble Wrap Directly on Artwork
Plastic may stick to paint or leave surface impressions. Use glassine, acid-free paper, or another suitable barrier first.
Forgetting the Corners
A thick layer over the front does not protect an exposed corner. Use fitted corner guards on every frame.
Using a Box That Is Too Large
Excess room allows the picture to shift. Use a fitted box and fill remaining gaps.
Packing Pictures Flat
Frames are generally safer standing vertically. Flat packing exposes the glass and broad surface to pressure.
Leaving Hanging Hardware Exposed
Sharp hooks and wire ends can puncture wrapping and scratch other pieces.
Applying Packing Tape to the Frame
Strong adhesive may damage paint, finishes, backing paper, or decorative material.
Stacking Boxes on Top
Frames and glazing are not meant to support household cargo. Keep the top clear.
Using Newspaper Against Artwork
Ink may transfer onto paper, canvas, mats, or frame finishes.
Carrying Large Frames Alone
The weight may be manageable, but the size can block your vision and twist the frame. Use a second person.
Packing Pictures for Storage
Artwork going into storage needs protection from more than bumps.
Choose a clean, dry, climate-controlled area when possible. Avoid basements, garages, attics, or units with major changes in humidity and temperature.
Store picture boxes:
- Upright
- Off bare concrete
- Away from exterior walls
- Away from water pipes
- Without weight on top
- In a stable row
- Where they cannot fall forward
Do not seal damp artwork inside plastic.
For long-term storage, use materials suited to the artwork. Acid-free and archival products are safer for valuable paper, photographs, canvases, and antique pieces.
When Professional Packing Is the Safer Choice
Packing a few family photos is manageable for many households. Large artwork, antique frames, mirrors, gallery walls, and valuable collections need more time and control.
Comfy Moving provides full service moving support for residential moves, apartments, offices, long-distance relocations, and selected fragile items.
Professional help may make sense when:
- The frame is too large for one person
- Several rooms contain framed artwork
- The move includes stairs
- Custom boxes are required
- The artwork is valuable or irreplaceable
- The frame has delicate decorative details
- You do not have enough packing materials
- The pictures will remain in storage
- The move must be completed on a short schedule
- You need help with loading and unloading as well
You can arrange packing for the entire home or ask for support with difficult items such as pictures, mirrors, televisions, furniture, and other fragile belongings.
Frequently Asked Questions
What Is the Best Way to Pack Pictures for Moving?
Wrap every picture individually, protect the glass and corners, add rigid cardboard support, place the frame upright in a fitted picture box, fill empty space, and label the carton clearly.
Should Pictures Be Packed Flat or Upright?
Framed pictures should generally be packed and transported upright. Flat placement exposes the broad surface and glass to pressure.
Can Several Pictures Go in One Box?
Yes, when the frames are small, individually wrapped, similar in size, and separated with cardboard or cushioning. Do not overload the box.
Do I Need Special Boxes for Pictures?
Picture or mirror boxes provide better support than ordinary cartons because they are tall, narrow, and often adjustable. Small frames may fit in reinforced standard boxes with enough padding.
Should I Put Tape on Picture Glass?
Some people use low-adhesion painter’s tape in an X or grid pattern to help control broken glass. Avoid strong packing tape and keep adhesive away from artwork and delicate finishes.
Can Bubble Wrap Touch a Canvas?
Bubble wrap should not rest directly against painted canvas. Place glassine, acid-free paper, or another suitable protective layer against the artwork first.
How Do I Pack a Picture Without Glass?
Protect the artwork with a nonabrasive first layer, add a rigid cardboard face guard, cover the corners, wrap the frame, and place it upright in a fitted box.
Can I Use Moving Blankets Instead of Picture Boxes?
Moving blankets provide cushioning but do not create a firm protective shell. They may work as an additional layer for short, controlled transport, but a picture box offers stronger protection.
Where Should Picture Boxes Go in the Truck?
Place them upright in a protected area where they cannot fall, slide, or be struck by furniture. Keep heavy items off the top.
Should Valuable Artwork Go in the Moving Truck?
That depends on the artwork, move, insurance, packing method, and transportation conditions. Irreplaceable pieces may be better carried personally or handled through specialized art-moving services.
Give Every Frame a Protected Route
The safest answer to how to pack pictures for moving is not simply “add more bubble wrap.”
Good protection starts with the right first layer, covered corners, a rigid outer surface, a fitted box, and a loading position that keeps the picture upright. Every frame should have enough support to prevent bending without being squeezed.
Treat each piece as a flat, fragile object rather than an ordinary box. That small change in approach can prevent cracked glass, chipped corners, scratched artwork, and damaged frames.
Comfy Moving can pack, carry, load, transport, unload, and place framed pictures as part of a full-service move or focused packing request. Your walls may be empty on moving morning, but the artwork should arrive ready to hang again.
Services that match this moving topic