

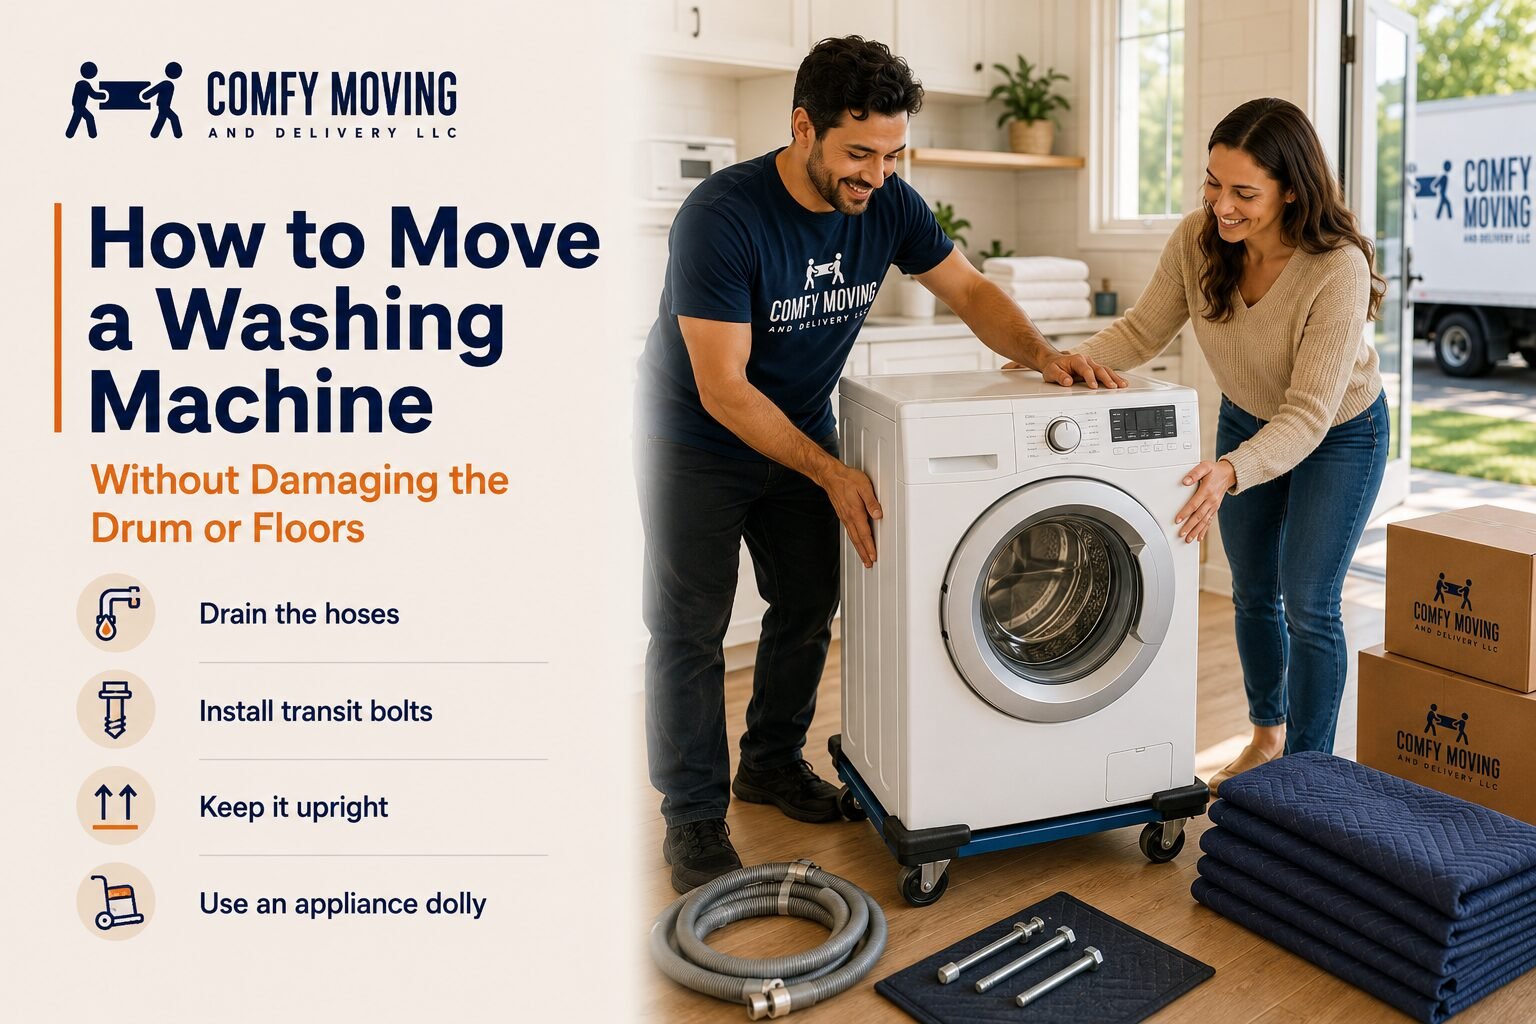
How to Move a Washing Machine Without Damaging the Drum or Floors
A washing machine looks sturdy right up until you need to get it through a narrow laundry-room door.
The cabinet is heavy, the center of gravity is awkward, there may still be water hiding in the hoses, and the drum inside is designed to move. Add tile, hardwood, stairs, tight corners, and a moving truck to the equation, and dragging the washer out by brute force becomes a bad plan very quickly.
Knowing how to move a washing machine is mostly about preparation. The actual trip from the laundry room to the truck may take only a few minutes. Protecting the drum, draining the appliance, preparing the route, and using the right moving equipment are what keep those minutes from becoming expensive.
Here is how to prepare, lift, and transport a washer while protecting both the machine and the home around it.
Why Washing Machines Need Special Preparation Before a Move
A washing machine is not just a heavy metal box.
Inside the cabinet, the drum and suspension system are built to absorb movement during wash and spin cycles. During transportation, however, potholes, ramps, stairs, sharp turns, and road vibration can make those internal components move in ways they were not designed to handle.
There is another problem outside the washer.
Trying to slide a heavy appliance directly over hardwood, laminate, vinyl, or tile can leave scratches, dents, cracked edges, or torn flooring. Moving it through a doorway without padding can also damage walls, trim, and the washer cabinet.
A safe move therefore has three separate goals:
- Keep the washer’s internal components stable
- Keep the appliance upright and controlled
- Prevent its weight from being transferred directly onto vulnerable flooring
Skipping any one of them can cause trouble even during a short local move.
What You Need to Move a Washing Machine
Gather your equipment before disconnecting the washer.
Depending on the appliance and the route through the home, you may need:
- Appliance dolly
- Moving straps
- Moving blankets
- Manufacturer-approved transit or shipping bolts
- Adjustable wrench or pliers
- Bucket or shallow pan
- Towels
- Work gloves
- Packing tape or stretch wrap
- Furniture sliders or floor protection
- Plastic bag for hoses and small parts
You should also locate the washer’s manual.
Different manufacturers use different drum-locking systems, hose arrangements, filters, and transportation requirements. Instructions for one washer should not automatically be applied to another.
Step 1: Find the Transit Bolts Before Moving Day
Do this early.
Many front-loading washing machines are originally delivered with transit bolts, sometimes called shipping bolts. They hold the internal assembly in a stable position while the appliance is being transported.
Those bolts are normally removed when the washer is installed.
And then, several years later, moving day arrives and nobody remembers where they went.
Look in the original appliance packaging, tool cabinet, laundry-room storage, or wherever installation hardware may have been kept.
If you cannot find them, check the model number and contact the manufacturer or an appliance-parts supplier for the correct replacements.
Do not assume that any bolt that happens to fit the opening is safe to use.
The hardware needs to match the washer.
Do all washing machines need transit bolts?
No. Transportation requirements differ between front-loaders, top-loaders, and individual models.
Front-loading machines commonly use shipping bolts because of the way the drum is suspended. Some top-loading machines use different systems or require different preparation.
Check the owner’s manual before attempting to immobilize anything.
Step 2: Empty and Clean the Washer
Before thinking about dollies and moving blankets, empty the drum completely.
Check for:
- Clothing
- Detergent pods
- Coins
- Socks caught around seals
- Items stored on top of the machine
If the washer needs cleaning, run an empty cleaning cycle or the cleaning procedure recommended by its manufacturer.
Doing this before the move helps prevent old detergent, moisture, and residue from sitting inside a closed appliance during transportation.
When the cycle is finished, leave the door or lid open so the interior can dry.
If possible, handle this part the day before the move rather than an hour before the movers arrive.
Step 3: Turn Off the Water Supply and Power
Once the washer is clean and dry enough to prepare for moving, shut off the water supply.
Most laundry hookups have separate hot and cold valves. Turn both off completely.
Next, unplug the washing machine.
Do not pull the plug out by yanking on the cord. Grip the plug itself.
If access behind the machine is tight, you may need to move the washer slightly forward. Protect the floor before doing so rather than dragging the appliance directly across it.
Step 4: Disconnect and Drain the Hoses
Even after the washer finishes a cycle, water may remain inside the supply hoses, drain hose, pump, or filter area.
Put a bucket or shallow pan underneath the connections before removing anything.
Disconnect the hot and cold water hoses carefully. A wrench or pliers may be needed if a connection is tight, but avoid crushing or deforming the fittings.
Allow the hoses to drain into the bucket.
Then disconnect the drain hose according to the washer’s installation setup.
Some models also have an accessible drain filter or emergency drain system that can hold additional water. Check the appliance manual before opening it because trapped water can come out quickly.
Keep towels nearby.
Once drained, place removable hoses and small fittings in a labeled plastic bag. Keeping washer parts together now saves you from searching through twenty boxes at the new home.
Step 5: Secure the Washer Drum Correctly
This is one of the most important parts of learning how to move a washing machine safely.
If the manufacturer specifies transit bolts, install the correct ones according to the manual.
They are designed to stabilize the drum or tub assembly during transportation so it cannot swing excessively as the washer moves through the house or rides in the truck.
Do not improvise by forcing random objects between parts of the machine unless the manufacturer specifically provides a transportation method that calls for it.
A blanket stuffed into the drum is not a replacement for a manufacturer-approved shipping system.
If you no longer have the bolts or are unsure how your washer should be secured, solve that problem before loading it into the truck.
A short drive does not make an unsecured drum immune to bumps.
Step 6: Secure the Cord, Hoses, and Door
Nothing should be hanging behind the appliance while it is being moved.
Coil the power cord and secure it to the machine without placing adhesive directly on a finish that could be damaged.
Do the same with any hose that remains attached.
If the detergent drawer is removable and likely to slide out, either secure it or remove it and pack it separately.
The washer door or lid should also remain closed while the machine is being handled.
Stretch wrap can be useful for keeping removable exterior components in place without relying heavily on tape.
Step 7: Protect the Floor Before Pulling the Washer Out
Many washer-moving problems happen before the appliance even reaches the front door.
A heavy machine dragged directly over the floor can scratch hardwood, tear vinyl, chip tile edges, or leave marks in softer flooring.
Before pulling the washer away from its position, create a protected path.
Depending on the flooring, that may involve:
- Appliance or furniture sliders
- Protective floor runners
- Heavy cardboard used carefully as a temporary surface
- Plywood sheets where appropriate
- Professional floor protection materials
The right method depends on the floor.
Hardwood needs protection from scratches and concentrated pressure. Tile needs protection from impact and sharp appliance edges. Carpet creates its own difficulty because a loaded appliance dolly can be harder to maneuver across a soft surface.
Also look beyond the laundry room.
Plan the entire path to the truck before you start moving the washer.
Check:
- Door width
- Hallway turns
- Staircases
- Thresholds
- Elevators
- Exterior steps
- Low railings
- Narrow gates
- Loose rugs
- Floor transitions
Remove anything that can catch a dolly wheel or force you to stop suddenly while supporting the appliance.
Step 8: Wrap the Washing Machine
Moving blankets protect both sides of the collision.
They help keep scratches and dents off the washing machine while also softening accidental contact with walls, railings, doors, and other belongings.
Cover the washer on all sides and secure the blankets so they cannot fall underneath the appliance while it is moving.
Avoid covering handles or areas the crew needs to grip until the machine is safely positioned on the dolly.
Pay extra attention to control panels, glass doors, corners, and protruding components.
A blanket that slides off halfway down a staircase is not much protection, so secure the padding before lifting.
Step 9: Use an Appliance Dolly Instead of Carrying the Washer by Hand
Washing machines are not good candidates for casual lifting.
They are heavy enough to cause serious injury, but their shape is almost as important as their weight. A washer is difficult to grip, can shift unexpectedly, and becomes especially awkward when stairs are involved.
An appliance dolly gives the machine a stable platform and allows much of the weight to stay supported rather than being carried.
Position the dolly according to its instructions and secure the washer to it with appropriate straps.
Do not rely on one person to hold the machine against the dolly while someone else pulls.
The washer should be properly secured before it starts moving.
Should you move a washing machine by yourself?
For most full-size washers, moving alone is a poor trade.
Even if you can technically tilt the machine onto a dolly, you still have to control it across thresholds, around corners, down ramps, and possibly on stairs.
One bad shift can damage the appliance, flooring, walls, or you.
If the move involves stairs, a particularly heavy machine, a narrow path, or limited lifting experience, professional moving help is the safer choice.
Comfy Moving offers labor-only moving services when you already have transportation arranged but need a crew for lifting, loading, or unloading.
Step 10: Keep the Washer Upright
Unless the manufacturer specifically gives different transportation instructions for your model, keeping the washing machine upright is the safer approach.
Tilting it temporarily to position a dolly is different from laying it flat for an entire trip.
An upright position helps reduce unnecessary stress on internal components and lowers the chance of residual water traveling into areas where it should not go.
This matters during:
- Carrying
- Dolly transport
- Ramp loading
- Truck transportation
- Unloading
Do not choose a horizontal position simply because it creates more space in the truck.
Protecting the appliance should come before squeezing in one more row of boxes.
How to Move a Washing Machine Down Stairs
Stairs turn an already awkward appliance into a much more demanding job.
Before starting, measure the staircase and any landings. Make sure the washer and dolly can clear railings, walls, and turns.
Never let the machine simply roll down one step at a time without controlled support.
The person on the lower side of the stairs can be exposed to a large portion of the washer’s weight if control is lost.
This is one of the situations where experience and proper equipment matter most.
If a washing machine needs to go down multiple stairs, through a narrow stairwell, or around a landing, bringing in trained movers is generally more sensible than improvising a carrying method on moving morning.
Step 11: Load the Washer Into the Moving Truck
Use a proper ramp or lift gate rather than trying to lift the washer directly from the ground into the truck.
Keep the appliance controlled as it travels up the ramp.
Once inside, choose a position where it can remain upright and where other belongings will not fall against it.
Do not leave the washing machine loose in the cargo area.
Secure it to an appropriate anchor point with moving straps so it cannot slide, tip, or bounce across the truck during braking and turns.
The drum may be locked, but the entire appliance still needs to be restrained.
Our residential movers handle appliances as part of household moves, along with furniture, boxes, and the rest of the home. That means the washer can be planned into the load instead of being treated as an awkward last-minute addition.
Protect the Washer From Other Items in the Truck
A perfectly prepared washing machine can still arrive with a dent if something heavy falls against it.
Avoid placing loose furniture, tools, metal bed frames, or other hard objects where they can strike the washer cabinet.
Keep its moving blankets in place during transportation.
The top of a washer may look like convenient storage space, but loading heavy boxes directly onto the appliance is not a good use of that space.
Pack the truck so the machine is stable, protected, and not carrying weight it was never designed to support.
What to Do When the Washer Reaches the New Home
Do not rush from unloading directly into the first load of laundry.
Move the washer to its final position while the area is still clear.
Then reverse the transportation preparation carefully.
Remove the transit bolts
If shipping bolts were installed for transportation, remove them before operating the machine.
This step matters.
Transit bolts are supposed to stabilize the internal assembly while the washer is being moved. Leaving them installed when the washer starts spinning prevents the suspension system from working normally.
Keep the bolts this time.
Put them in a labeled bag and store them with the appliance manual or other washer hardware. Your future self may be grateful.
Reconnect the water supply
Reconnect the hot and cold hoses to the correct valves.
Inspect washers, seals, hoses, and fittings for wear before reusing them. Moving into a new home is not the ideal time to ignore an old cracked supply hose.
Tighten connections according to the appliance instructions and turn the water back on gradually.
Check for leaks around every connection.
Reinstall the drain hose
Position the drain hose according to the manufacturer’s installation requirements.
A poorly placed drain hose can cause drainage problems or leaks even when the washer itself survived the move perfectly.
Level the washer
Once the appliance is in its permanent location, check that all feet make stable contact with the floor.
A washer that rocks before it is turned on is not properly positioned.
Adjust the leveling feet according to the manufacturer’s instructions.
An unstable washer can vibrate excessively during a spin cycle and may gradually move away from its original position.
Run a test cycle
Before filling the drum with clothing, run the test or empty cycle recommended for your washer.
Stay nearby.
Watch the water connections, drainage, and spin behavior.
Stop and investigate if you see a leak, hear an abnormal sound, or notice violent movement.
How to Move a Front-Load Washing Machine
Front-load washers need particular attention because their suspended internal assemblies commonly rely on transit bolts during transportation.
Before moving one:
- Check the manufacturer’s transportation instructions.
- Drain the appliance completely.
- Locate the correct shipping bolts.
- Install them in the specified positions.
- Secure the front door.
- Wrap the cabinet and glass area carefully.
- Keep the machine upright during the move.
- Remove the shipping bolts before using it again.
Do not assume that a front-loader can travel safely just because the drum looks empty.
The parts you are protecting are behind the drum.
How to Move a Top-Load Washing Machine
A top-loading machine may use a different drum or tub securing system.
Check the owner’s manual rather than borrowing instructions from a front-load washer.
The general moving process remains similar:
- Drain it completely
- Disconnect electricity and water
- Secure loose parts
- Prepare the machine according to manufacturer instructions
- Protect the exterior
- Use an appliance dolly
- Keep it upright
- Strap it securely in the truck
Also make sure the lid cannot open while the washer is being tilted or moved.
Can You Move a Washing Machine Without Transit Bolts?
If your washer is designed to use transit bolts, getting the correct replacement hardware is the safest answer.
Do not substitute ordinary hardware simply because it fits through the rear panel.
If the original bolts are missing, find the washer’s full model number and check with the manufacturer or an authorized parts supplier.
If the manufacturer provides an alternative transportation procedure, follow that procedure exactly.
If not, moving the washer without its intended drum restraint creates an unnecessary risk to the suspension and other internal components.
Waiting for the correct hardware is usually cheaper than repairing a damaged appliance.
Can You Lay a Washing Machine on Its Side?
Treat upright transportation as the default unless the appliance manufacturer specifically says your model may be moved another way.
Different washers have different internal layouts, and residual water can remain inside even after careful draining.
If height or vehicle space makes upright transport impossible, check the manual or contact the manufacturer rather than guessing which side is safest.
How Long Before Moving Should You Disconnect a Washing Machine?
Preparing it the day before the move works well for many households.
That gives you time to:
- Finish the final load of laundry
- Clean the washer
- Drain the hoses
- Let the interior dry
- Find missing hardware
- Prepare the route out of the home
Disconnecting everything five minutes before loading creates exactly the kind of rushed situation where water ends up on the floor and shipping bolts get forgotten.
Common Washing Machine Moving Mistakes
A washer is much easier to move when you know what not to do.
Dragging it directly across the floor
Heavy appliance feet can scratch or tear flooring quickly.
Use appropriate floor protection and moving equipment.
Forgetting the water inside the hoses
A washer that appears empty can still release water after a hose is disconnected.
Keep a bucket and towels ready.
Moving a front-loader without checking the transit bolts
The exterior may look perfectly stable while the internal assembly is free to move.
Check the manual before transportation.
Carrying the machine without proper equipment
Strength does not solve an awkward center of gravity, slippery surfaces, or stairs.
Use an appliance dolly and enough qualified help.
Leaving the washer loose inside the truck
A washer can move considerably during hard braking or a sharp turn.
Strap it securely.
Forgetting to remove the shipping bolts afterward
The hardware that protects the washer in the truck should not remain installed when the machine returns to normal operation.
Make bolt removal part of your setup process at the new home.
Washing Machine Moving Checklist
Before the washer leaves the old home:
- Empty the drum
- Clean the washer
- Let the interior dry
- Shut off hot and cold water
- Unplug the power cord
- Disconnect supply hoses
- Disconnect the drain hose
- Drain remaining water
- Find the owner’s manual
- Install manufacturer-approved transit hardware if required
- Secure cords, hoses, door, lid, and detergent drawer
- Protect the floors and moving path
- Wrap the washer with moving blankets
- Secure it to an appliance dolly
Inside the truck:
- Keep the washer upright
- Protect it from nearby furniture and hard objects
- Secure the appliance with proper straps
- Do not stack heavy boxes on top
At the new home:
- Move the washer into its final position
- Remove transit bolts before operation
- Reconnect water hoses
- Reinstall the drain hose
- Check all connections for leaks
- Level the appliance
- Run an empty test cycle
- Store the transit bolts for the next move
Frequently Asked Questions
What is the safest way to move a washing machine?
Drain and disconnect the washer, secure its internal components according to the manufacturer instructions, wrap the exterior, place it on an appliance dolly, and transport it upright. Protect floors before moving it and secure the machine inside the truck so it cannot shift.
Do I really need shipping bolts to move a washer?
If your washer’s manufacturer specifies shipping or transit bolts for transportation, yes. They are there to stabilize the internal assembly during a move. Use the correct hardware for your exact model.
How do I move a washing machine without scratching hardwood floors?
Do not drag the washer directly over the floor. Use appropriate appliance sliders, floor protection, or other materials designed to spread the weight and prevent direct contact. Plan the route before tilting or moving the appliance.
Can two people move a washing machine?
Two capable people with the right appliance dolly may be able to handle some straightforward moves, but the route matters as much as the washer itself. Stairs, narrow hallways, tight corners, uneven surfaces, and heavy models can require additional trained help.
Should I drain my washing machine before moving it?
Yes. Drain the appliance and its hoses as completely as the manufacturer allows. Water left inside can leak onto flooring, moving blankets, boxes, and other belongings.
Should a washing machine be transported upright?
Upright transportation is the safest default for most household moves unless your washer’s manufacturer provides different instructions for that specific model.
When should I remove the transit bolts?
Remove them after the washer has reached its final location and before operating it. Keep the bolts for a future move.
Let the Washer Be the Heavy Part, Not the Whole Day
Figuring out how to move a washing machine safely is not difficult because the process is mysterious. It is difficult because several small jobs have to be done in the right order.
Drain the water before it reaches the floor. Lock the drum before it reaches the truck. Protect the flooring before the appliance starts moving. Use equipment that keeps the washer under control instead of relying on muscle alone.
And if you would rather not spend moving morning balancing a washing machine on a dolly, we can handle that part.
Comfy Moving works with household appliances as part of local, residential, long-distance, and labor-only moves. We can take care of the lifting, floor-aware handling, loading, transportation, and unloading while you focus on getting the rest of the home ready.
A washing machine should arrive at the new place ready for laundry, not ready for a repair call.
Services that match this moving topic